Honeywell TH6320ZW2003 Manual: A Comprehensive Guide
This manual provides detailed instructions for installing‚ operating‚ and troubleshooting the Honeywell Home TH6320ZW2003/U Z-Wave thermostat‚ ensuring optimal performance and user experience.
The Honeywell TH6320ZW2003 is a Z-Wave enabled‚ programmable digital thermostat designed for convenient and efficient home climate control. This thermostat seamlessly integrates into your existing Z-Wave network‚ allowing for remote access and control via compatible smart home hubs. It offers advanced features like programmable schedules‚ geofencing‚ and compatibility with Z-Wave scenes and groups‚ enhancing energy savings and comfort.
This model‚ part of the Honeywell Home (Resideo) T6 Pro series‚ provides a user-friendly interface and precise temperature management. The thermostat supports both heating and cooling systems and is suitable for a wide range of residential applications. Understanding its features and proper installation‚ as detailed in this manual‚ will unlock its full potential. It’s a smart solution for modern homes seeking enhanced comfort and energy efficiency.
What’s Included in the Box
Upon opening the Honeywell TH6320ZW2003 package‚ you should find the following components. Firstly‚ the TH6320ZW2003 Z-Wave Digital Programmable Thermostat itself. Secondly‚ a backplate for wall mounting‚ essential for secure installation. Included are mounting screws and wall anchors to ensure compatibility with various wall types. A wire label kit is provided to help identify and correctly connect the thermostat wiring during installation.
Furthermore‚ the package contains a detailed installation guide offering step-by-step instructions. You’ll also find a quick start guide for a simplified setup process. Please verify that all listed items are present before proceeding with the installation. If any components are missing or damaged‚ contact Honeywell customer support for assistance. Retain the packaging for potential future use or warranty claims.
Safety Precautions
Important safety warnings must be observed during the installation and operation of the Honeywell TH6320ZW2003 thermostat; Always disconnect power to your HVAC system at the breaker box before beginning any wiring connections to prevent electrical shock or damage to the equipment. Installation should be performed by a qualified technician if you are unfamiliar with electrical wiring.
Do not expose the thermostat to excessive moisture or extreme temperatures. Keep the device away from flammable materials. Ensure proper wiring connections according to the provided wiring diagram to avoid short circuits or fire hazards. This device is intended for indoor use only. Do not attempt to disassemble or repair the thermostat yourself; contact Honeywell for service. Follow all local electrical codes during installation.

Installation Guide
Carefully follow these steps for a successful installation of your Honeywell TH6320ZW2003 thermostat‚ ensuring proper wiring and Z-Wave network integration for optimal control.
Tools Required for Installation
Before beginning the installation process of your Honeywell TH6320ZW2003 thermostat‚ gather the necessary tools to ensure a smooth and efficient setup. A small flathead screwdriver is essential for terminal connections‚ while a Phillips head screwdriver will be needed for mounting the thermostat baseplate securely to the wall.
Additionally‚ wire strippers are crucial for preparing the thermostat wires‚ ensuring clean and reliable connections. A level will help guarantee the thermostat is mounted straight for aesthetic appeal and accurate readings. A digital multimeter can be incredibly useful for verifying power is off before working with wiring‚ enhancing safety.
Finally‚ a pencil is handy for marking wire locations‚ and a smartphone or tablet will be required for Z-Wave network setup and remote access configuration. Having these tools readily available will streamline the installation process and minimize potential delays.
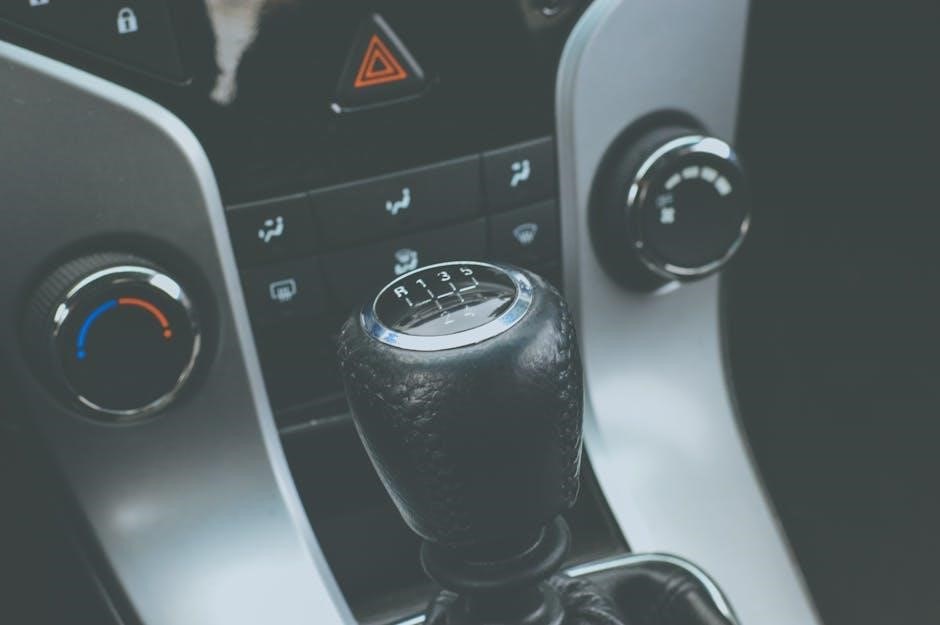
Wiring Diagram and Terminal Identification
Carefully review the wiring diagram included with your Honeywell TH6320ZW2003 thermostat‚ as incorrect wiring can damage your HVAC system. Common terminals include Rh and Rc for 24V power‚ W for heating‚ Y for cooling‚ and G for the fan. The C terminal is often required for consistent power and Z-Wave functionality.
Identify your existing wiring colors and match them to the corresponding terminals on the thermostat baseplate. Typically‚ red wires are used for 24V power‚ white for heating‚ yellow for cooling‚ and green for the fan. However‚ wiring colors can vary‚ so always double-check with your HVAC system’s documentation.
If you have a heat pump system‚ additional terminals like O/B may be present. Consult a qualified HVAC technician if you are unsure about any wiring connections. Proper identification and connection are vital for safe and reliable operation.
Connecting the Thermostat to Your HVAC System
Before connecting the TH6320ZW2003‚ ensure power is completely shut off to your HVAC system at the breaker box. Carefully detach the wires from your old thermostat‚ labeling each one for easy identification. Using the wiring diagram as a guide‚ connect each wire to the corresponding terminal on the thermostat baseplate.
Securely mount the thermostat baseplate to the wall‚ ensuring it is level. Gently push any excess wire back into the wall opening. Snap the thermostat display onto the baseplate. Restore power to your HVAC system at the breaker box.
The thermostat should power on and guide you through the initial setup process. Verify that the heating and cooling systems respond correctly to thermostat commands. If issues arise‚ double-check all wiring connections and consult a professional.
Z-Wave Network Integration
To integrate the TH6320ZW2003 into your Z-Wave network‚ first‚ put your Z-Wave controller into inclusion mode. On the thermostat‚ navigate to the Z-Wave settings menu – typically found under network or setup options. Initiate the Z-Wave inclusion process on the thermostat itself.
The thermostat will begin searching for a Z-Wave network. Once detected‚ follow the on-screen prompts to complete the pairing process. Successful inclusion will display a confirmation message. You can then control the thermostat remotely through your Z-Wave hub or controller.
For advanced features like scenes and groups‚ refer to your Z-Wave controller’s manual for specific instructions. Ensure compatibility between the thermostat and your Z-Wave system for optimal functionality.
SmartStart Setup (TH6320ZW2007 Model)
The TH6320ZW2007 model features SmartStart‚ simplifying Z-Wave network inclusion. Before beginning‚ ensure your Z-Wave hub supports SmartStart. Power on the thermostat; it will automatically enter SmartStart inclusion mode upon initial power-up.
Scan the QR code located on the thermostat or its packaging using your Z-Wave hub’s mobile app. This initiates the pairing process without manual intervention. The thermostat will automatically join your Z-Wave network.
If the SmartStart process fails‚ a manual inclusion may be necessary. Refer to the Z-Wave Network Integration section for instructions. SmartStart streamlines setup‚ but manual inclusion remains a viable alternative.

Thermostat Operation
Understanding the display icons‚ setting the date and time‚ and programming schedules are key to effectively controlling your home’s comfort with this thermostat.
Understanding the Display Icons
The Honeywell TH6320ZW2003 thermostat utilizes a variety of display icons to communicate its current status and operational mode. Familiarizing yourself with these icons is crucial for efficient operation. A flame icon indicates the heating system is actively running‚ while a snowflake signifies cooling is in progress.
A fan icon displays the fan’s operational status – on‚ auto‚ or circulate. Battery indicators alert you to low battery levels‚ prompting replacement. Z-Wave icons confirm successful network connection and signal strength. Icons also represent programmed schedules‚ temporary holds‚ and permanent holds‚ allowing for quick identification of active settings.
Furthermore‚ icons signal system errors or alerts‚ requiring troubleshooting. The manual provides a comprehensive guide to each icon‚ ensuring you can readily interpret the thermostat’s feedback and maintain optimal comfort and control within your home environment.
Setting the Date and Time
Accurate date and time settings are fundamental for proper scheduling and thermostat functionality on the Honeywell TH6320ZW2003. To set the date and time‚ navigate to the thermostat’s menu using the control buttons. Typically‚ this involves accessing the “Settings” or “Configuration” option.
Within the settings menu‚ select “Date” and “Time” to adjust each parameter individually. Use the up and down arrows to modify the values‚ confirming each selection. Ensure the correct AM/PM designation is chosen for accurate timekeeping.
Properly configured date and time enable the thermostat to execute programmed schedules as intended‚ optimizing energy efficiency and comfort. Refer to the detailed instructions within the user manual for specific button sequences and menu navigation tailored to your TH6320ZW2003 model.
Programming Schedules
The Honeywell TH6320ZW2003 allows for customized heating and cooling schedules to maximize comfort and energy savings. Access the scheduling function through the thermostat’s menu‚ typically found under “Program” or “Schedule” settings. You can create different schedules for weekdays and weekends‚ or even individual days.

For each period (Wake‚ Leave‚ Return‚ Sleep)‚ set the desired temperature. The thermostat supports multiple periods per day‚ allowing for granular control. Utilize the up/down arrows to adjust temperatures and the “Save” or “Confirm” button to finalize changes.
Review your programmed schedule carefully to ensure it aligns with your lifestyle. Properly configured schedules optimize energy usage‚ reducing utility bills while maintaining a comfortable home environment. Consult the full manual for advanced scheduling options.
Temporary and Permanent Hold Functions
The Honeywell TH6320ZW2003 offers both temporary and permanent hold functions for overriding programmed schedules. A Temporary Hold allows you to set a specific temperature for a defined duration‚ after which the thermostat automatically reverts to the programmed schedule. Access this feature via the “Hold” button‚ then specify the desired temperature and hold time.
Conversely‚ a Permanent Hold maintains the selected temperature indefinitely‚ completely overriding the programmed schedule until manually canceled. This is ideal for extended periods away or when consistent temperatures are preferred.
To cancel a hold‚ navigate back to the scheduling menu and select “Cancel Hold” or a similar option. Understanding these hold functions provides flexibility and control over your home’s climate.
Fan Control Settings
The Honeywell TH6320ZW2003 thermostat provides versatile fan control options to enhance comfort and air circulation. You can select from “Auto‚” “On‚” and “Circulate” modes. In “Auto” mode‚ the fan operates only during heating or cooling cycles‚ optimizing energy efficiency. Selecting “On” keeps the fan running continuously‚ providing consistent airflow throughout your home.
The “Circulate” mode runs the fan intermittently‚ even when heating or cooling isn’t active‚ helping to distribute air and maintain a more even temperature. Access these settings through the thermostat’s menu system‚ typically under a “Fan” or “System” option.
Proper fan control contributes to improved air quality and overall comfort within your living space.

Advanced Features
The Honeywell TH6320ZW2003 unlocks Z-Wave scenes‚ remote access‚ and geofencing capabilities‚ enhancing your smart home experience and energy management potential.
Z-Wave Scenes and Groups
The Honeywell TH6320ZW2003 thermostat integrates seamlessly with your Z-Wave network‚ allowing for the creation of customized scenes and groups to automate your home comfort. Scenes enable you to control multiple Z-Wave devices simultaneously with a single command – for example‚ setting a “Goodnight” scene that lowers the thermostat‚ dims the lights‚ and locks the doors.
Grouping allows you to control several thermostats together‚ ideal for zoned heating and cooling systems. Refer to your Z-Wave controller’s user manual for specific instructions on creating scenes and groups‚ as the process varies depending on the controller. The Honeywell Home trademark is utilized under license from Honeywell International Inc.‚ ensuring quality and compatibility within the Z-Wave ecosystem. Explore the possibilities to personalize your home automation experience!
Remote Access and Control
The Honeywell TH6320ZW2003 thermostat’s Z-Wave connectivity unlocks convenient remote access and control of your home’s climate. Through a compatible Z-Wave hub and its associated mobile application‚ you can adjust temperature settings‚ view current conditions‚ and manage schedules from anywhere with an internet connection.
This feature provides peace of mind and energy savings‚ allowing you to optimize comfort even when you’re away. Ensure your Z-Wave hub is properly configured and connected to the internet for seamless remote operation. Explore the hub’s app for detailed control options and customization features. Enjoy the flexibility of managing your home’s temperature‚ regardless of your location!
Geofencing Capabilities
The Honeywell TH6320ZW2003‚ when integrated with a compatible Z-Wave hub supporting geofencing‚ offers automated temperature adjustments based on your location. This intelligent feature utilizes your smartphone’s GPS to detect when you’re approaching or leaving your home.
As you depart‚ the thermostat can automatically switch to an energy-saving away mode‚ reducing heating or cooling costs. Upon your return‚ it can restore your preferred comfort settings. Geofencing requires setup through your Z-Wave hub’s application‚ defining a virtual boundary around your home. This provides a hands-free approach to climate control‚ maximizing both comfort and efficiency without manual intervention;

Troubleshooting
This section details common issues‚ reset procedures‚ and error code explanations for the Honeywell TH6320ZW2003‚ aiding in quick resolution of operational problems.
Common Issues and Solutions
Thermostat unresponsive: Verify proper power supply and wiring connections. Check the breaker panel and ensure the thermostat is receiving voltage. If the display remains blank‚ a wiring issue or faulty thermostat is likely.
Z-Wave connectivity problems: Ensure the Z-Wave controller is within range and functioning correctly. Attempt to re-include the thermostat into the Z-Wave network following the SmartStart or inclusion process. Interference from other devices can also cause connectivity issues.
Incorrect temperature readings: Confirm the thermostat is not exposed to direct sunlight or drafts. Calibrate the temperature sensor if necessary‚ referencing the settings within the thermostat’s menu. A faulty sensor may require replacement.
Scheduling errors: Double-check programmed schedules for accuracy‚ verifying time and temperature settings. Temporary or permanent hold functions may override scheduled programs‚ so ensure they are disengaged if not intended.
HVAC system not responding: Confirm the HVAC system is powered on and functioning correctly. Verify the wiring connections between the thermostat and the HVAC system are secure and accurate.
Resetting the Thermostat
Factory Reset: To restore the Honeywell TH6320ZW2003 to its original factory settings‚ navigate to the settings menu on the thermostat display. Locate the “Reset” or “Factory Defaults” option and confirm the action. This will erase all programmed schedules‚ settings‚ and Z-Wave network configurations.
Z-Wave Network Reset: If experiencing Z-Wave connectivity issues‚ you may need to exclude the thermostat from the current network before re-including it. Access the Z-Wave exclusion mode through the thermostat’s menu‚ following the instructions provided by your Z-Wave controller manufacturer.
Soft Reset: A simple power cycle can often resolve minor operational glitches. Turn off the power to the thermostat at the breaker panel for approximately 30 seconds‚ then restore power. This performs a soft reset without erasing settings.
Caution: Performing a factory reset will require re-configuring all thermostat settings and re-integrating it with your Z-Wave network. Back up important settings if possible before resetting.
Error Codes and Their Meanings
The Honeywell TH6320ZW2003 thermostat utilizes error codes to indicate specific system malfunctions. A “C” error typically signifies a lack of common (C) wire power‚ crucial for consistent operation. “E1” often points to a sensor communication failure‚ requiring verification of wiring connections. “E2” suggests a heating or cooling system issue‚ potentially a faulty relay or wiring problem.
“Z-Wave Error” indicates a problem with the Z-Wave communication‚ possibly interference or network issues. Consult your Z-Wave controller’s manual for troubleshooting. If a code isn’t listed in the thermostat’s display‚ refer to the comprehensive manual available online or contact Honeywell support.
Important: Document the error code before attempting any repairs. Disconnect power before inspecting wiring. If unsure‚ consult a qualified HVAC technician.

Specifications
The Honeywell TH6320ZW2003 boasts Z-Wave compatibility‚ programmable scheduling‚ and a digital display‚ offering efficient home climate control and energy savings.
Technical Specifications of TH6320ZW2003
Model Number: TH6320ZW2003. This thermostat operates utilizing Z-Wave technology‚ ensuring seamless integration with compatible smart home hubs. It supports programmable 7-day scheduling‚ allowing customized temperature settings for optimal comfort and energy efficiency. The display type is digital‚ providing clear and easy-to-read temperature and system information.
Power Source: 24 VAC. Temperature Range: 40°F to 90°F (4°C to 32°C). Humidity Range: 0% to 95% non-condensing. Z-Wave Frequency: 908.42 MHz. The thermostat is designed for compatibility with standard HVAC systems‚ including forced air‚ heat pump‚ and radiant heat. It features both heating and cooling control capabilities. Dimensions and weight specifics can vary‚ but it’s designed for standard wall mounting.
Warranty: Refer to the warranty information section for details on coverage. Regulatory Compliance: Meets relevant safety and emissions standards. Always consult the full manual for complete and up-to-date specifications.
Warranty Information
Honeywell warrants this TH6320ZW2003 thermostat to be free from defects in material and workmanship for a period of one (1) year from the date of purchase. This warranty applies to normal residential use. Should the product prove defective within the warranty period‚ Honeywell will‚ at its option‚ repair or replace the defective unit.

To obtain warranty service‚ proof of purchase (receipt) is required. This warranty does not cover damage resulting from improper installation‚ misuse‚ abuse‚ accident‚ alteration‚ or unauthorized repair. Damage caused by external factors‚ such as power surges‚ is also not covered.
This warranty gives you specific legal rights‚ and you may have other rights which vary from state to state. For complete warranty details and claim procedures‚ please visit the Honeywell Home website or contact customer support.
Recycling Instructions
Honeywell is committed to environmental responsibility. When your TH6320ZW2003 thermostat reaches the end of its useful life‚ please do not dispose of it with your regular household waste. Electronic products contain valuable materials that can be recovered and reused‚ and improper disposal can harm the environment.
Instead‚ please contact your local waste management authority for specific instructions on how to properly recycle electronic devices in your area. Many communities offer designated collection points or recycling programs for electronics.
Do not attempt to disassemble the thermostat yourself‚ as it may contain components that are hazardous if not handled correctly. Following these recycling instructions helps conserve resources and protects our planet. Refer to local regulations for compliant disposal methods.